Table of Contents
View all the videos from this unit a single playlist on youtube
Java GUIs #
Now that we have a solid sense of Object Oriented Programming, in the next few units we are going to explore examples of OOP in different areas. First up, is Graphical User Interfaces (or GUIs).
While the material below should get your started on this topic, a really good tutorial that you should also read is provided by Oracle (the maintainer of Java):
There are a few basic ideas we should consider with GUIs:
- We have Windows, buttons, menus, labels, drawing areas, text boxes, etc., and
- As the user interacts with these elements, the program needs to react in application-specific ways.
Even something as simple as a button in a GUI is actually hugely complicated: it has to be drawn, and redrawn whenever its window gets minimized than maximized again, or redrawn when it is partially covered by a window layed over it that subsequently moves out of the way; it has to detect when it has been clicked (and possibly change appearance while the mouse is depressed) and actually cause some kind of action when clicked; it might be grayed out and unclickable for some periods of time; it might have a “tooltip” that tells what it does if the mouse hovers over it for long enough; and so on. And this for only one button! Certainly many, many lines of code must be written (at some level) to handle all this complexity. What do we want as future GUI programmers? We want to not have to worry about all that stuff! We want:
- to be able to use components like buttons, windows, text-fields, etc. without having to mess with or worry about how they are implemented,
- to be able to modify specific aspects of components like buttons, windows, text-fields, etc. when necessary without messing up all the other aspects (e.g. making a window change colors for 10 second intervals shouldn’t make the click-X-to-close stop working) and without having to mess with or worry about how they are implemented,
- to be able to have our programs react to user actions on GUI components (like a button click) without having to mess with or understand how those GUI components are implemented
Doesn’t this sound like the separation of interface from implementation concerns that motivated object oriented programming in the first place? It should scream out to you that these design goals can be met by making GUI components “objects”, i.e. instances of classes, that we can “use” by simply calling methods, that we can modify/customize/build-on via inheritance, all without having to understand or worry about the implementation. So there is a class for buttons (JButton), and a class for windows (JFrame), and a class for text input fields (JTextField) and so on. A button needs one interface for a “click-reactor” that you (and every other programmer) can implement in different ways for each different button you create. So we just have a Java interface for that (ActionListener) and we hand the button an object that implements that interface and say “when you are clicked, call the react-to-a-click method from the click-reactor interface on this object”. Polymorphism then provides the mechanism for allowing many implementations for that one click-reactor interface.
First, we’re just going to learn how to create the most basic GUI component - a window - and how to react to the most basic user action - clicking the x to close the window. Although that seems very limited, it will show us the basic mechanisms that permeate the whole Java Swing API (the GUI API we’ll use). Later, we’ll do some more work on aligning elements within panels to make more advanced GUIs.
Windows and Events #
Windows: creating, displaying, destroying #
The basic Java class for a window is JFrame. You create a JFrame like you do anything else: you use new statement!
JFrame f = new JFrame();
However, while this creates the JFrame, it does not display it. It only gets displayed when you set it to be visible.
f.setVisible(true);
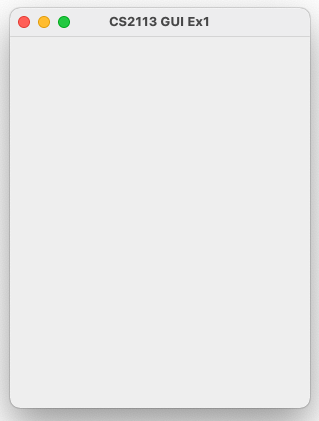
Now if you create a program with only those two lines, it “works” but is more than a bit underwhelming because we didn’t define the size of the frame or other information. You may only get the control buttons of a window, like below.

We can fix this and do something slightly more interesting, and =there are several more things that you almost certainly want to do whenever you create a JFrame.
import javax.swing.*

public class Ex1Jframe{
    public static void main(String args[]){
        JFrame f = new JFrame();
        f.setTitle("CS2113 GUI Ex1"); // sets title that appears on the top bar
        f.setSize(300,400);          // sets the size (in pixels) of the frame
        f.setLocation(100,100);      // sets the top-left corner of the window on the desktop
        f.setDefaultCloseOperation(JFrame.EXIT_ON_CLOSE); // makes it so that closing window exits program
        f.setVisible(true);
    }
}
And when we run this, we get something a bit more exciting.
Now, to emphasize the fact that a window is nothing more than JFrame object, let’s create 5 windows and pop them all up on the screen at once. The following program will create all five first, wait for the user to enter an ‘x’, and only then will it actually display the five on the screen.
import javax.swing.*;

public class Ex2 {
  public static void main(String[] args) {
    JFrame[] F = new JFrame[5];

    for( int i = 0; i < 5; i++ ) {
      JFrame f = new JFrame();
      f.setTitle("CS2113 GUI Ex2 " + i ); // sets title that appears on the top bar
      f.setSize(300, 400);
      f.setLocation(100 + 10 * i, 100 + 10 * i);

       //f.setDefaultCloseOperation(JFrame.EXIT_ON_CLOSE);

      F[i] = f;
    }

    //just as a way to delay
    System.out.print("Enter x to continue: ");
    System.console().readLine();

    //open them all up at once
    for( int i = 0; i < 5; i++ ) {
      F[i].setVisible(true);
    }
  }
}
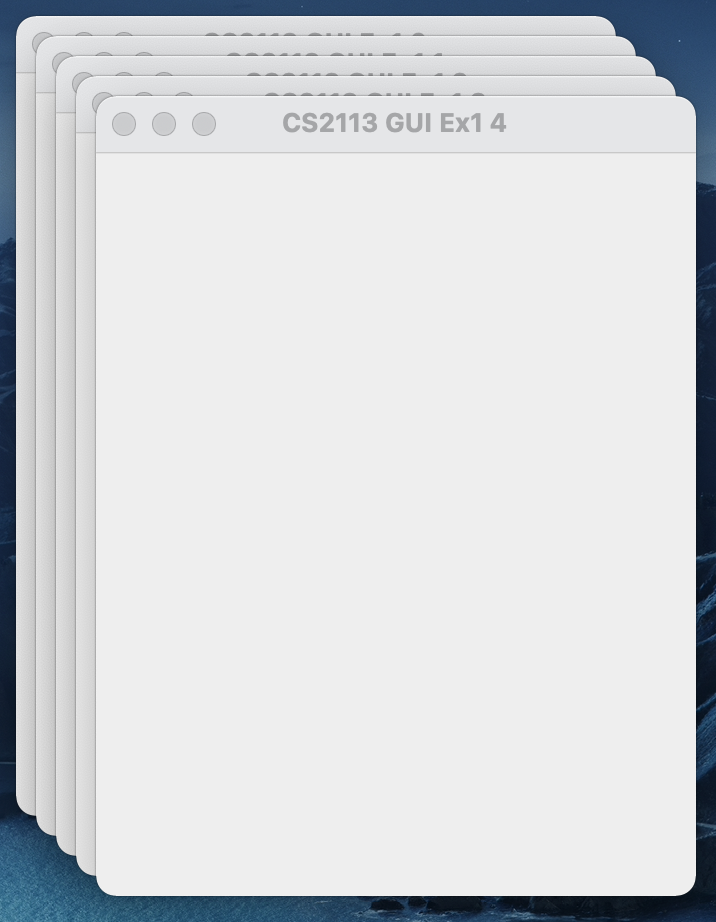
You’ll notice that the EXIT_ON_CLOSE line is commented out. Why? With that uncommented, closing any one window exits the program. On the other hand, with it commented out like it is, even when all five windows have been closed, the program is still running. We have to do a ctrl-c in the terminal window to exit it. That’s something we’ll fix in a bit.
Despite the weirdness of window closing in our example, I hope you’ll see that having windows simply be objects like everything else in Java, is pretty nice. We can create them, store them, and manipulate them with methods calls, just as we do for more familiar things like Strings and Exceptions.
But main is over!?!? Why doesn’t the program just end as soon as it starts? #
One thing about the programs we’ve just looked at should be bothering you. By the time we finishing executing setVisible(true), main() is done. Shouldn’t the program stop at that point? The reason the program doesn’t stop is because programs that use the Swing GUI components (like JFrame) automatically use at least two threads. A thread is an executing stack of function calls, and we’ll discuss these more in our next unit.
For now, though, all programs you’ve seen up to this point have been single-threaded, which means that there is only one executing stack of function calls. The thread running is the main thread executing from main().
In a multi-threaded program there are more than one simultaneously executing stacks of function calls, e.g., one for main() and one for the GUI. A multi-threaded program doesn’t exit until all threads have finished executing. So, going back to our Swing program with the many JFrames, we have the main thread (the stack of function calls with the call to main() on the bottom) and we have a second thread called the event dispatch thread in which executes all code related to displaying the GUI and responding to user actions within the GUI. So, even though the main thread ends as soon as all the setVisible(true) are done, the event dispatch thread continues running … and so the program continues running.
The fact that all GUI actions run in this even dispatch thread is going to be an important topic in the future. But for now, we’ll comfortably ignore that fact!
Handling events in Swing: counting dead windows #
The program we ended with in the above had the unfortunate problem that it kept running even after the last window was closed. To handle this properly, i.e. to exit the program only when all five windows have closed, we need to simply count the number of window closures. When that count gets to five, we should exit the program.
The closing of a window is an event, just like button pushes, combo-box selections, or text box changes, all of which we’ll consider in the future. So dealing with this one little problem will give us an opportunity to examine the general design of event handling in Java’s GUI API. That basic model is quite simple: a GUI component keeps a list of Listener objects that are listening to the various events that can occur with that component, and when an event happens the component, it calls a method on the Listener object that is associated with that kind of event, and passes it an Event object that contains information about the details of the event that occurred.
To be concrete, actions on JFrames generate WindowEvent objects, listeners for these events are classes that implement the WindowListener interface. That interface is
public interface WindowListener {
  void windowActivated(WindowEvent e);
  void windowClosed(WindowEvent e);
  void windowClosing(WindowEvent e);
  void windowDeactivated(WindowEvent e);
  void windowDeiconified(WindowEvent e);
  void windowIconified(WindowEvent e);
  void windowOpened(WindowEvent e);
}
… which shows you all the different events that might occur. When you create a class that realizes that interface, you need to define each of these methods, which means providing the code that you want to execute in response to each of these actions. For starters, let’s simply print out a message every time a window closes, just to show that we can react to these events.
import javax.swing.*;
import java.awt.event.*;

public class Ex3 {

   //class for handling events
  static class WindowDisposer implements WindowListener {
    public void windowActivated(WindowEvent e) {}

    public void windowClosed(WindowEvent e)    {}

    //only care about one event, the rest do nothing
    public void windowClosing(WindowEvent e) {
      System.out.println("Closed a window!");
    }

    public void windowDeactivated(WindowEvent e) {}

    public void windowDeiconified(WindowEvent e) {}

    public void windowIconified(WindowEvent e)   {}

    public void windowOpened(WindowEvent e)      {}
  }

  public static void main(String[] args) {
    WindowDisposer wd = new WindowDisposer();

    JFrame[] F = new JFrame[5];

    for( int i = 0; i < 5; i++ ) {
      JFrame f = new JFrame();
      f.setTitle("CS2113 GUI Ex3 " + i);
      f.setSize(300, 400);
      f.setLocation(100 + 10 * i, 100 + 10 * i);
      f.addWindowListener(wd); //add the event listener
      F[i] = f;
    }

    System.out.print("Enter x to continue: ");
    System.console().readLine();

    for( int i = 0; i < 5; i++ ) {
      F[i].setVisible(true);
    }
  }
}
After adding the listener, every time we close the window, Closed a window! will print. Essentially, our WindowDisposer class provides the method that should be called to the JFrame when a given event should occur. It’s the JFrame that actually calls the method. This style of programming is called event driven programming.
You may notice, though, this is a lot of extra code to do a simple tasks, and if you are like everyone else in the world, you are horrified at this. As a convenience, just to ease that pain, the Java API has defined a class called WindowAdapter that implements WindowListener, simply defining all the methods with empty bodies, { } (like above). This way, we can define our WindowDisposer class as extending WindowAdapter and only override the one method we care about, windowClosed(WindowEvent e). The new version of the program below, is functionally the same as the previous version but somewhat shorter and more straightforward.
import javax.swing.*;
import java.awt.event.*;

public class Ex4 {

  //extend WindowAdapter
  static class WindowDisposer extends WindowAdapter {

    //only overide windowClosing, the rest are no-ops by default
    public void windowClosing(WindowEvent e) {
      System.out.println("Closed a window!");
    }
  }

  //Main method sme as above ...
}
Closing the loop, we are able to solve our original problem by making WindowDisposer do a simple bit of work: each time a window gets closed, decrement a counter. When the counter gets to zero, exit the program.
import javax.swing.*;
import java.awt.event.*;

public class Ex5 {
  static class WindowDisposer extends WindowAdapter {
    int count;
    public WindowDisposer(int i) {
      count = i; //initialize with the number of windows
    }

    public void windowClosing(WindowEvent e) {
      System.out.println("Closed a window!");

      if (--count == 0) { //decrement as closed
        System.exit(0); //finally exit the program
      }
    }
  }

  public static void main(String[] args) {
    WindowDisposer wd = new WindowDisposer(5);

    JFrame[] F = new JFrame[5];

    for( int i = 0; i < 5; i++ ) {
      JFrame f = new JFrame();
      f.setTitle("CS2113 GUI Ex5 " + i);
      f.setSize(300, 400);
      f.setLocation(100 + 10 * i, 100 + 10 * i);
      f.addWindowListener(wd); //add the event listener
      F[i] = f;
    }

    System.out.print("Enter x to continue: ");
    System.console().readLine();

    for( int i = 0; i < 5; i++ ) {
      F[i].setVisible(true);
    }
  }
}
So, what do we take away from this? Java Swing’s event handling mechanism is fundamentally about polymorphism and inheritance (or at least the limited form of inheritance offered by interfaces). In fact, it is a prime example of multiple implementations of the same interface, because every time we need to define how to react to an event (like a window closing) we provide a different implementation of the listener interface.
Extending JFrames #
A common design pattern in GUIs is that you actually want to extend the core functionality of a GUI component. In this case, that would be a JFrame. There are many reasons to do this, for example, if you want your JFrame to maintain some state.
Consider, for example, if we wanted each JFrame to remember it’s index in the array F in the above sample code. This is actually really hard! The main method runs in its own thread independent of the JFrames, there isn’t any way to directly pass this information.
However, a class that extends a JFrame is still a JFrame. So we can create our own version of a JFrame with all the functionality, but also pass to it an id (or an index) reference.
import javax.swing.*;
import java.awt.event.*;

//Extending JFrame
class DisposableJFrame extends JFrame {
  private int id;
  public DisposableJFrame(int id, WindowDisposer wd) {
    this.id = id;
    this.setTitle("CS2113 GUI Ex6 " + this.id);
    this.setSize(300, 400);
    this.setLocation(100 + 10 * this.id, 100 + 10 * this.id);
    this.addWindowListener(wd);//set up the window listener
  }

  public int getId() {
    return id;
  }
}
Now in our main class, we can pass instantiate DisposableJFrames.
public class Ex6 {
  //See Ex5 for WindowDisposer

  public static void main(String[] args) {
    WindowDisposer wd = new WindowDisposer(5);

    JFrame[] F = new JFrame[5];

    for( int i = 0; i < 5; i++ ) {
      F[i] = new DisposableJFrame(i,wd); //<---
    }

    System.out.print("Enter x to continue: ");
    System.console().readLine();

    for( int i = 0; i < 5; i++ ) {
      F[i].setVisible(true);
    }
  }
}
Retrieving the window from the event #
We can even take this example one step farther by having the WindowDisposer print out the id of the frame that was just closed. This is done by referencing the WindowEvent in the listerner interface.
Recall that the WindowListerner interface required the realization of the following method formats:
public interface WindowListener {
  void windowActivated(WindowEvent e);
  void windowClosed(WindowEvent e);
  void windowClosing(WindowEvent e);
  void windowDeactivated(WindowEvent e);
  void windowDeiconified(WindowEvent e);
  void windowIconified(WindowEvent e);
  void windowOpened(WindowEvent e);
}
What is WindowEvent e? That’s an object that carries information which window generated the event, as well other information about the event. See the API for reference.
Most relevant to this dicussion is the method getWindow(), which returns which Window changed state. A Window is a class in the swing system, and is the parent of Frame class, which is the parent of JFrame. So a JFrame is-a Window, and so, we can retrieve which JFrame generated the event via e.
This gives us the opportunity to write a slightly more complicated version of the WindowDisposer class which retrieves the DisposableJFrame via e.getWindow() and then the id of that DisposableJframe to print to the screen.
import java.util.*;
import javax.swing.*;
import java.awt.event.*;

class WindowDisposer extends WindowAdapter {
   int count;
   public WindowDisposer(int i) {
     count = i; //initialize with the number of windows
   }

  public void windowClosing(WindowEvent e) {
    //cast to get the true type
    DisposableJframe dj = (DisposableJFrame) e.getWindow();

    //retrieve the ID
    int id = dj.getId();
    System.out.println("Closed a window " + id);

    if (--count == 0) { //decirment as closed
       System.exit(0); //finally exit the program
     }

  }
}
Fuller Feature GUIs #
Now that you have a better sense of how GUIs work. Let’s dive into a few examples that are a bit more complicated that allow for more interaction than just opening and closing a window. This includes buttons, text fields, and layouts.
Adding a JButton and the wonderful world of LayoutManagers #
One of the big lessons is that GUI components are just objects - i.e. they are simply instances of classes, just like any other. For windows we used the class JFrame. The class for buttons is JButton. So you can create a new button with label “Button” with the statement:
JButton b = new JButton("Button");
Note that the label could have been “George” instead of “Button” and it would all be the same. There is a big difference between a JFrame and a JButton, however. A JFrame is a window that sits on the screen all by itself. But a JButton is a component that must be placed inside some other GUI container - like a JFrame or some other component that can act as a container for other GUI elements (such as a JPanel – more later).
So, for starters we’d like to add the JButton to a JFrame. However, now things get a bit complicated. Where in the JFrame window do we want the JButton to go? This question is outrageously subtle because there might be lots of components sitting in a container like a JFrame, and because windows can get resized or, perhaps, were never given a set size at all, and the programmer wants it to be “big enough”.
To deal with this complication of where to place components that get added to containers like JFrames, the designers of Java’s Swing library turned to OOP principles: let’s make the positioner of components within the container be … an object. Specifically, there is an interface named LayoutManager, and objects implementing this interface are used to position components. By default, JFrame’s have LayoutManagers of type BorderLayout, which thinks of the screen being divided up into regions: North, East, South, West and Center. When you add a component to a JFrame, you specify which BorderLayout region you want it in. So if f is a JFrame you might say if you want a new button with label “Button” added to the Center region,
f.add(new JButton("Button"), BorderLayout.CENTER);
and f you want it added to the East region, you say
f.add(new JButton("Button"), BorderLayout.EAST);
These regions automatically expand or shrink to fit the various components into their various regions. For example, we can see this layout in action using the following code sample:
import javax.swing.*;
import java.awt.*;

public class BorderLayoutEx1{

    public static void main(String args[]){
        JButton bEast = new JButton("EAST");
        JButton bNorth = new JButton("NORTH");
        JButton bSouth = new JButton("SOUTH");
        JButton bWest = new JButton("WEST");
        JButton bCenter = new JButton("CENTER");

        JFrame f = new JFrame();
        f.add(bEast, BorderLayout.EAST);
        f.add(bNorth, BorderLayout.NORTH);
        f.add(bSouth, BorderLayout.SOUTH);
        f.add(bWest, BorderLayout.WEST);
        f.add(bCenter, BorderLayout.CENTER);

        f.pack(); //do alignment within the layout

        f.setDefaultCloseOperation(JFrame.EXIT_ON_CLOSE);
        f.setVisible(true);

    }
}
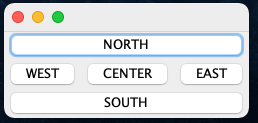
And if we remove bEast, the center button will expand into that space.
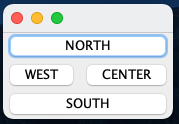
Finally if we remove bEeast and bWest the center button expands into both spaces, perfectly alligning with the bNorth and bSouth buttons.

Layouts within layouts: JPanel #
Now suppose you wanted to align two buttons in the center (or north, or south) of a BorderLayout, well then you’re in trouble. It can only support one element at time. But that’s ok, because we can create a container for multiple components with its own layout and then add that to the frame.
For example, if we want two buttons in the center, we cannot use the existing frame’s border layout. Instead we need to add a new component within the center of the frame, that itself is controlled with a layout.
We use JPanel to do this nested components. A JPanel, like a JFrame, is a object that can contain other components, but unlike a JFrame a JPanel cannot be displayed as a window frame. It needs to be, itself, contained with a JFrame.
Using a JPanel, we can now establish the layout as a BorderLayout, adding two buttons, and then adding the entire panel to the center of the frame.
import javax.swing.*;
import java.awt.*;

public class BorderLayoutEx2{

    public static void main(String args[]){
        JButton bEast = new JButton("EAST");
        JButton bNorth = new JButton("NORTH");
        JButton bSouth = new JButton("SOUTH");
        JButton bWest = new JButton("WEST");

        JFrame f = new JFrame();

        //add to the frame
        f.add(bEast, BorderLayout.EAST);
        f.add(bNorth, BorderLayout.NORTH);
        f.add(bSouth, BorderLayout.SOUTH);
        f.add(bWest, BorderLayout.WEST);

        //A panel is a comonent that can hold other components
        JPanel p = new JPanel();
        //set the layout of the panel
        p.setLayout(new BorderLayout());

        //add components to the panel
        JButton bCenterEast = new JButton("CENTER-EAST");
        JButton bCenterWest = new JButton("CENTER-WEST");
        p.add(bCenterEast, BorderLayout.EAST);
        p.add(bCenterWest, BorderLayout.WEST);

        //add the panel to the frame, in the center
        f.add(p, BorderLayout.CENTER);

        f.pack(); //do alignment within the layout

        f.setDefaultCloseOperation(JFrame.EXIT_ON_CLOSE);
        f.setVisible(true);

    }
}
This results in the following layout
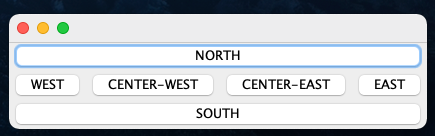
(Quick aside about JPanel: The JPanel is the workforce of the GUI’s and you’ll use them a lot. In fact, you can imagine, in a OOP way, extending a JPanel if there are functionality within that context you want to use, such as adding a number of components. We don’t show that here, but now that you’re developing your OOP skills, you should be able to imagine it.)
Button Action Events #
We have buttons, we know where to place them, let’s do something with them! Just like with window closing events, we can implement an ActionListner that will respond to a button click event.
As a simple example, let’s consider an example of a GUI with a single button and a text label of “Hello” and on every button click, “Hello” changes to “Goodbye.” If “Goodbye” is displayed, it changes back to “Hello”
Let’s start with the setup in the frame
import javax.swing.*;
import java.awt.*;

public class HelloGoodbyeEx1{

    public static void main(String args[]){
        JFrame f = new JFrame();
        f.setTitle("Hello/Goodbye Ex1");

        JLabel l = new JLabel("Hello");
        JButton b = new JButton("Click me!");

        //add event listener for the button
        b.addActionListener(new ButtonClickListenerEx1(l));

        f.add(b, BorderLayout.SOUTH);
        f.add(l, BorderLayout.NORTH);

        f.pack();
        f.setVisible(true);

    }

}
Two new things here. First is the JLabel, which is a GUI component for displaying short text. The initial text displayed is “Hello”. Second is the ButtonClickListenerEx1 class. This is where the action is, and so let’s take a look at that code
import javax.swing.*;
import java.awt.*;
import java.awt.event.*;

public class ButtonClickListenerEx1 implements ActionListener {

    private JLabel label;

    public ButtonClickListenerEx1(JLabel label){
        this.label = label; //save the label to modify
    }


    public void actionPerformed(ActionEvent e) {
        if (label.getText().equals("Hello")) {
            label.setText("Goodbye"); //flip text back and forth
        }else{
            label.setText("Hello");
        }
    }
}
When the button is clicked, the actionPerformed() method is called, which then checks the state of the label, flipping the values.
Anonymous classes #
With that prior example, you may be asking, that’s a lot of programming to simply write a single method? And you’re right. So Java provides for us a way to quickly realize the ActionListener without actually having to write an entire class.
Let’s look at the same example, this time, all contained within a single class file.
import javax.swing.*;
import java.awt.*;
import java.awt.event.*;

public class HelloGoodbyeEx2{

    public static void main(String args[]){
        JFrame f = new JFrame();
        f.setTitle("Hello/Goodbye Ex1");
        f.setDefaultCloseOperation(JFrame.EXIT_ON_CLOSE);

        JLabel l = new JLabel("Hello");
        JButton b = new JButton("Click me!");

        //using an anonymous (static) class
        b.addActionListener(new ActionListener(){
                //implement the one method here
                //shares the name space with the hole class
                public void actionPerformed(ActionEvent e){
                    if (l.getText().equals("Hello")) {
                        l.setText("Goodbye");
                    }else{
                        l.setText("Hello");
                    }

                }
            });

        F.add(b, BorderLayout.SOUTH);
        f.add(l, BorderLayout.NORTH);

        f.pack();
        f.setVisible(true);

    }
}
We still add an ActionListener for the button, but we do not give it a name. Instead we define the single method that needs to be realized in-line with the code. This creates a new class definition for us just for this context. This new class is called an anonymous class because it is an unnamed class.
Lambda Expressions #
You may notice that ActionListener is an interface that requires only a single method to be realized actionPerformed. It’s a lot of code to get to just define a single method. Newer version of Java have recognized this inefficiency and now have a new syntax that allows us to capture the action, the body of the method, without all the extra syntax.
For example, let’s rewrite the addActionListener portion of the above code in the new syntax:
        b.addActionListener((e) -> {
                    if (l.getText().equals("Hello")) {
                        l.setText("Goodbye");
                    }else{
                        l.setText("Hello");
                    }

                });
How does this work? The syntax is pretty straight forward for creating the method.
// .-- argument
// v
  (e) -> { /*Function BODY*/)
And then Java looks at the method that is needed to be defined at this point in the code. Namely, that’s the method:
public void actionPerformed(ActionEvent e){ }
It will then auto-define this method, with that argument and fill in the function body. Yay! So many fewer lines of code.
An aside …
Lambda expressions show up in other parts of java. One where it could be very helpul is to operate over lists. For example, we can define a function to operate for each item in a collection:
ArrayList<Integer> numbers = new ArrayList<Integer>();
    numbers.add(5);
    numbers.add(9);
    numbers.add(8);
    numbers.add(1);
    numbers.forEach( (n) -> { System.out.println(n); } );
This will print out each item in the list. And suppose you want to store the function that will operate over the list? Java defines a Consumer class that manages such functions
import java.util.function.Consumer;
//...

Consumer<Integer> method = (n) -> { System.out.println(n); };
numbers.forEach( method );
There’s a lot, lot, lot more to Lambda’s in java. They are very useful, but hopefully this can open some of that up to you.
(Source W3Schools)
Bigger Example: Converter GUI #
Now, let’s look at a slightly more advanced GUI with event handling that can convert length measurement units from one to another, such as feet to meters, or inches to centimeters, and so on.

Here’s the code for this, which you should quickly review, and then we can highlight some important things to note
import javax.swing.*;
import java.awt.*;
import java.awt.event.*;

public class UnitConverter extends JFrame{

    private JTextField fromValue;
    private JTextField toValue;

    private JComboBox<String> fromUnits;
    private JComboBox<String> toUnits;

    private final String[] units = {
        "feet", "inches", "meters", "centimeters"
    };

    private final double[] cfact = {
        1.0000, 1.0 / 12, 3.28084, 0.0328084
    };

    public UnitConverter(){
        super();

        fromValue = new JTextField("1.0", 10);
        toValue   = new JTextField("1.0", 10);
        fromUnits = new JComboBox<String>(units); //dropdown options of from/to
        toUnits   = new JComboBox<String>(units);
        toValue.setEditable(false); //do not let the result be edited

        // Create panel with flow layout and add GUI elements
        JPanel dpanel = new JPanel(new FlowLayout());
        dpanel.add(new JLabel("from: "));
        dpanel.add(fromValue);
        dpanel.add(fromUnits);
        dpanel.add(new JLabel(" to: "));
        dpanel.add(toValue);
        dpanel.add(toUnits);

        //add the same action listener for all
        CoverterActionListener a = new CoverterActionListener();

        fromValue.addActionListener(a); //change the number in from (when enter is hit)
        toUnits.addActionListener(a);//change the to units
        fromUnits.addActionListener(a); //change the from units


        this.add(dpanel);
        this.setDefaultCloseOperation(JFrame.EXIT_ON_CLOSE);
        this.pack();
    }

    //use a private, inner class to handle events
    private class CoverterActionListener implements ActionListener{

         public void actionPerformed(ActionEvent e) {

             //get the index selected in the comboboxes
             int fIdx = fromUnits.getSelectedIndex();
             int tIdx = toUnits.getSelectedIndex();

             //retrieve the from value as a double
             double fVal = Double.parseDouble(fromValue.getText());

             //first convert from value to feet and then divde by the
             //convert to units
             double tVal = (fVal*cfact[fIdx])/cfact[tIdx];

             //round to 3 decimal places
             tVal = Math.round(tVal * 1000.0)/1000.0;

             toValue.setText(""+tVal); //set the toValue text field
         }
    }

    public static void main(String args[]){
        //main method
        UnitConverter u = new UnitConverter();
        u.setVisible(true);
    }
}
There are a few new GUI element we haven’t used yet, a JComboBox. This is a drop down option, and it is initialized by passing an array (or a colleciton) of elements for the user to select. In this case, it’s the units
fromUnits = new JComboBox<String>(units); //dropdown options of from/to
The second new element is the FlowLayout. Like a BorderLayout, this aligns elements in a container, either a frame or a panel. But it adds them adjacently, horizontally, rather than in a cardinal direction.
The last (somewhat) new thing here is the fact that we use a private, inner class to manage the action events. This works well in this context because the private inner class has access to all the GUI components, and can take appropriate action.
What makes this particularly interesting (at least to me) is that we can use the same action listener for three different components. This is the beauty of OOP: they all rely on the same interface. When we apply the listener to a JComboBox, the event occurs when a new item is selected. When the listener is applied to a JTextField the event occurs when enter is hit.
Material in this unit adopted from IC211 at USNA