Table of Contents
View the video for this project on Youtube
Project 2: It’s a cat and mouse game… #
This is a two part project. The first part of the project will require you to submit a UML diagram and descriptions of your OOP design to complete the project. The second part of the project is your full submission.
Preliminaries #
Github Classroom Link: https://classroom.github.com/a/rVM2JZF6
Testing #
There is no test script. There is built in debugging tools that can help you develop your code and perform grading.
Compiling your code #
Your code should compile with javac
javac *.java
Window users #
Note, if you are developing this project on a windows machine, you must use the github bash terminal in vscode for the pipeline to run properly.
Mice, Cat, ZombieCat Simulation #
In this project, you will complete a point simulation of a city of mice, cats, and zombie-cats! Once your simulation is visualized, it may look like the animation below.
A quick description of this visualization. The blue dots are mice, the yellow/cyan dots are cats, and the red/black zombie-cats. Cats chase mice, and when they catch a mouse, they eat it. If a cat doesn’t eat enough, they turn into a zombie-cat. Zombie-cats chase mice and other cats. They can eat a mouse, but if they eat a cat, that cat turns into a zombie-cat!
You’re job in this lab is use good OOP to design this simulation.
A tour of the starter code #
In the repository, you are provided with the following Java files that you should review. They are heavily commented, and will provide the guide posts for completing this project. Not all details are described here, so I strongly encourage you to read through the entirety of the code provided for you.
Creature.java #
A class that represents a basic creature in the simulation. You’ll need to extend this class for your mice, cats, and zombie cats (and more!).
City.java #
This class represents the city/space in which the creatures live. All the creates are stored in the creatues list:
private List<Creature> creatures; //list of all creatues
The creatures is a full list of all the active creatures in the simulation. t
Importantly, the City class has a method simulate that describes the primary routine of each iteration off the simulation. You cannot edit this method, but you should review it carefully because it will dictate how you design your other classes. This routine is provided below:
   //You need to realize in your code such that simulate works for
    //**ALL** levels of simulkation, which means you'll need to take
    //advantage of inheritance and polymorphism.
    public void simulate() {
        //DO NOT EDIT!

        //You get this one for free, but you need to review this to
        //understand how to implement your various creatures

        //First, for all creatures ...
        for(Creature c : creatures){
            c.step();
        } //move everyone forward one step in simulation

        //Second, for all cratures ...
        for(Creature c : creatures){
            c.takeAction();
        }//take some action based on the new positions

        //Third, for all creatures ...
        LinkedList<Creature> deadCreatures = new LinkedList<Creature>();
        for(Creature c: creatures){
            if(c.isDead()) deadCreatures.add(c);
        }//find those that are dead after the action is taken

        //Four, for all creatures ...
        for(Creature c: deadCreatures){
            creatures.remove(c);
        }//remove any creatures that are dead

        //Five, add in any new creatures that have been added before ...
        addNewCreatures();

        //Five, for all creatures
        for(Creature c : creatures){
            System.out.println(c);
        }//print out all creatures
Reading through the simulate method, you see that first, all the creatures are moved forward by taking a step in the simulation. This could move the creature in a direction, determine if it starved, or other general state changes.
In the takeAction method, each creature assess its surroundings, determines if it should eat something, chase something, or do something.
After all the actions are taken, any creatures that are dead are removed from the creatures list. And then any new creatures are added. Note that there is a method addNewCreatures that is provided for you, and duplicated below.
 public void addNewCreatures(){
        while(!creaturesToAdd.isEmpty()){
            creatures.add(creaturesToAdd.remove());
        }
    }
This method clears the creaturesToAdd queue. So if you want to add a new creature, you construct it and add it to this queue. There is an example of this in the constructor of the City.
Simulation.java #
This class has the main method for the simulation. You may need to do minor modifications to this while editing and to meet the requirements of the assignment.
GridPoint.java #
This class implements a row/column pair that can be used as a key in a map. You should read this class, but you will not need to edit it.
Running, Visualization and debugging your simulation #
Like in Lab 6, we will separate the simulation from visualization.
Simulating #
You can run the simulator with the following arguments:
                      .-- Number of rounds to simulate
                      |    .- The seed of the random number generator
                      v    v
java Simulator 8 2 0 1000 42
               ^ ^ ^
               | | '-number of inital zombie cats
               | '- number of initial cats
               '- number of initial mice
The output of the simulator is a series of x and y coordinates describing the locations of each of the creatures. It may look like below:
37 48 r
74 43 k
20 32 r
50 59 r
5 21 c
4 24 b
75 54 b
49 53 r
5 46 b
74 53 c
done 930
Like in Lab 6, the first two numbers are a coordinate, and the letter is a color. Once complete, the done command is given. Different from Lab 6, done also outputs the round number.
Optionally, you can include --DEBUG as the final argument, like below, if you want to iterative step through the simulation
$ java Simulator 8 2 0 1000 42 --DEBUG
42 10 b
50 3 b
38 66 b
63 13 b
53 76 b
55 32 b
48 23 b
27 23 b
43 43 y
27 20 c
done 1
Enter anything to continue:
41 10 b
50 2 b
38 67 b
64 13 b
54 76 b
54 32 b
47 23 b
28 23 b
45 43 y
27 22 c
done 2
Enter anything to continue:
A quick note about the simulation space. It’s a torus. That means when you go off one edge, you wrap around to the other edge of the board. You can see this in the animation above. Your code should account for that.
Visualizing #
Like in Lab 6, we’ve provided a plotting tool Plotter.jar which you can pipe your output to, like so
java Simulator 8 2 0 1000 42 | java -jar Plotter.jar
This will open a visual, like the animation above. There are two arguments you can provide to the plotter.
-
java -jar Plotter.jar 42: the 42 indicates how many milliseconds between iterations. Note that the default rate is 500 millis, or half a second. -
java -jar Plotter.jar --DEBUG: if the debug flag is set, then the plotter renders additional information about the location of points and the round number. Like below.
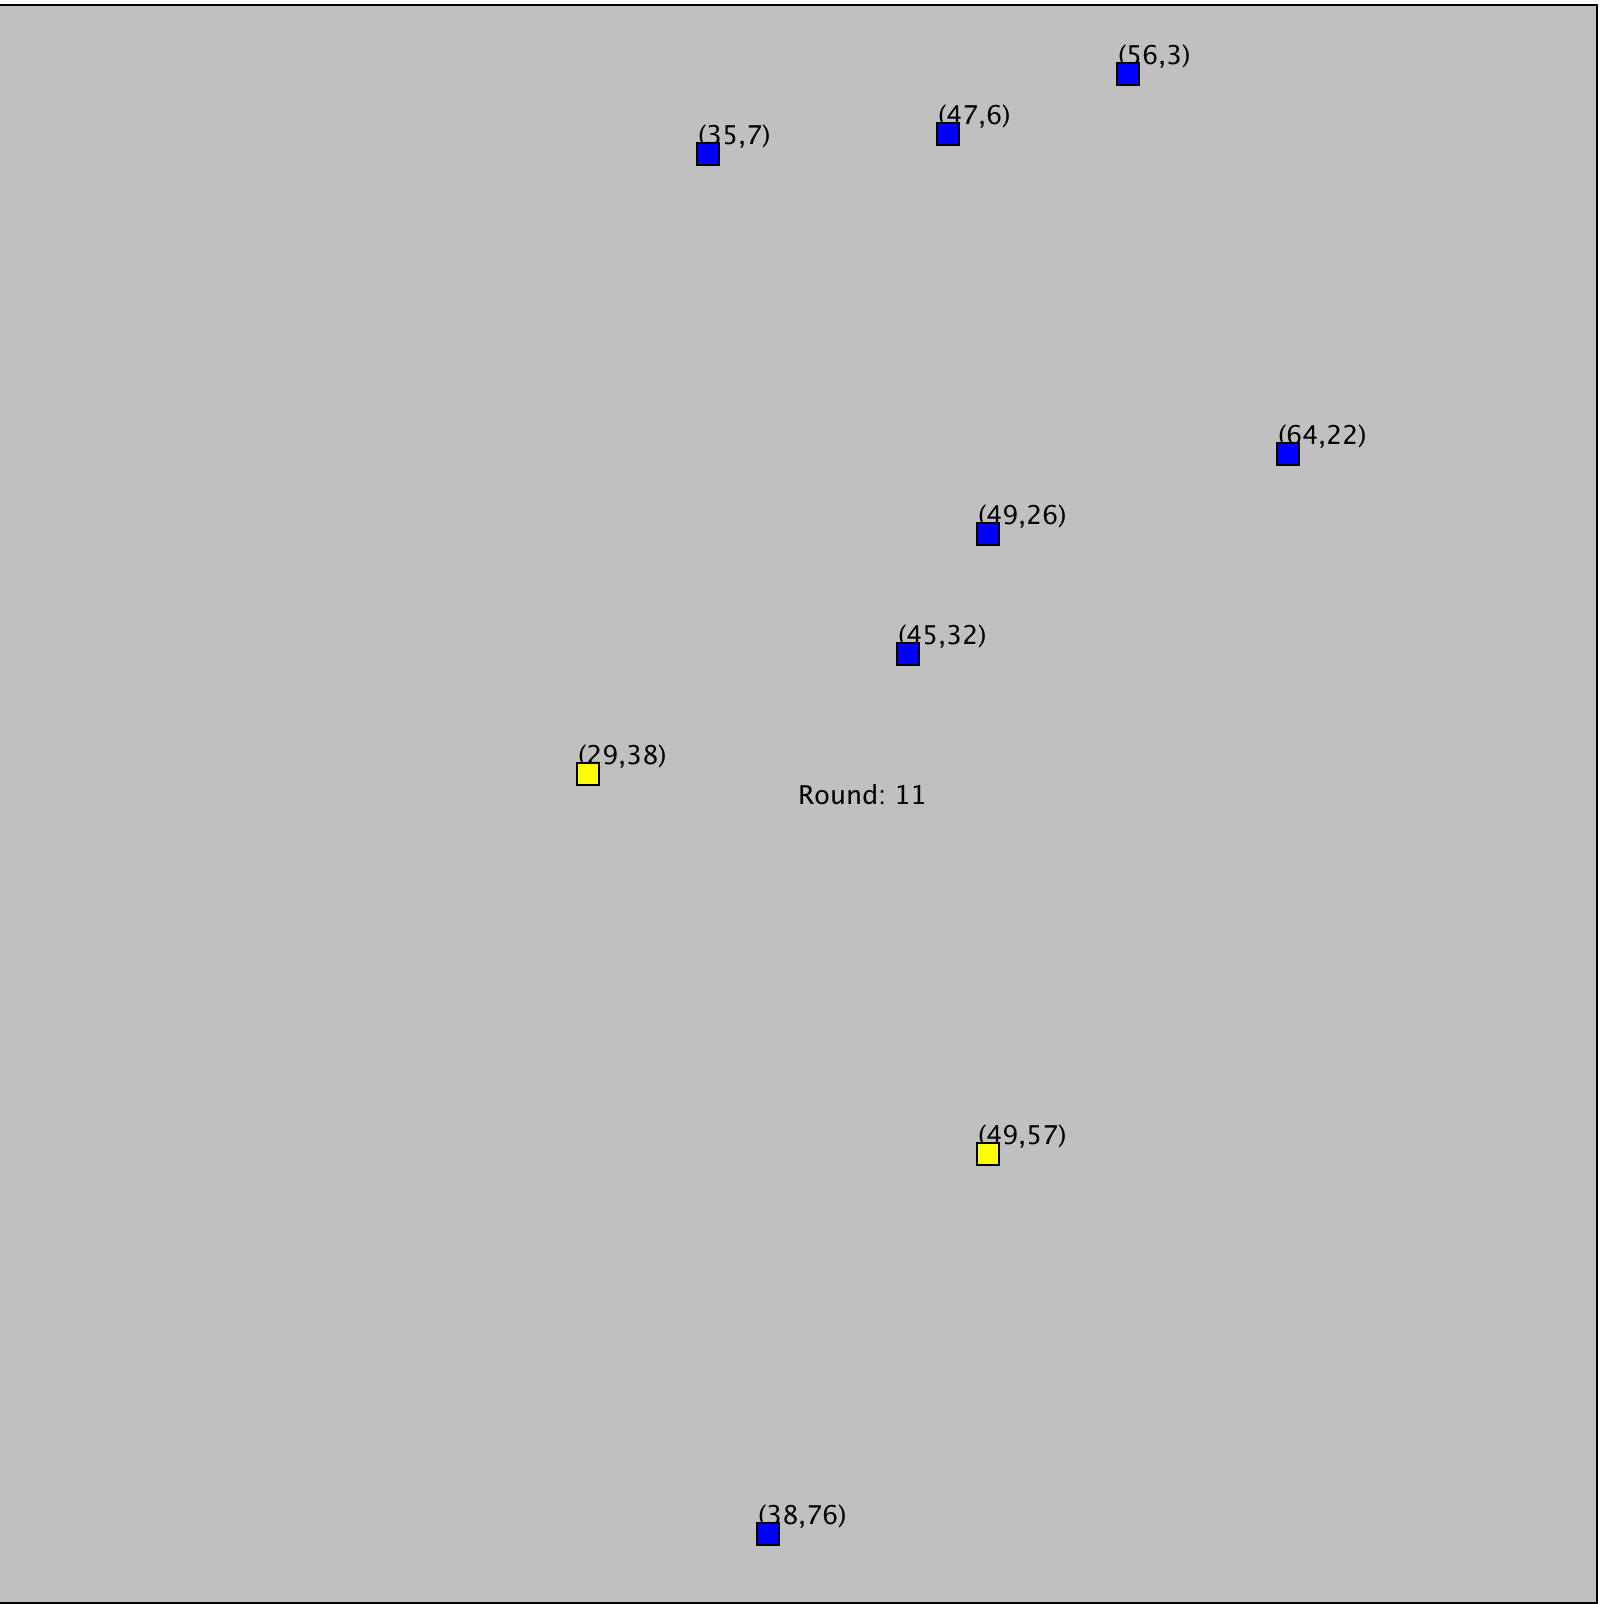
Note that you can combine these two arguments, but you must set the millis first, and then the debug flag.
java -jar Plotter.jar 42 --DEBUG
DEBUGGING TIP: If you want to connect your simulator to the plotter, but also print out debug information from your simualor code, use
System.err.println()methods. Only items printed tostdoutare passed to the plotter.
Requirements #
There are two requirements for this project. The first requirement (Part A) involves presenting a UML diagram for your project that describes the Creature object relationships as well as how you utilized OOP design. The second requirement (Part B) is to actually implement the code.
Part A : UML Diagram and Planning Meeting(25 Points) #
This part of the project must be signed off by a TA or LA by the due date specified
For Part A, you should complete the following items and discuss them in a 5-minute meeting with a TA or LA during lab or office hours. Both should also be included in your github repo.
UML.png: Create UML diagram for your simulation code and creatures up to Level 4 (see below). This should include primarily your creatures but also the interaction with other code.OOP-design.md: Complete the markdown file that describes your OOP design and class structure for these creatures. It should be 2-3 sentences per creature that covers the hierarchical relationships..
In your meeting, be prepared for feedback that you should incorporate into your project.
Part B: Implementation (75 Points) #
There are different levels of implementation you should complete. Note that in README.md file, you must indicate which level you reached. You should submit working code up to one level. It is very difficult to provide partial credit for semi-working code that doesn’t fully achieve one of the levels.
Level 0: Mice (up to 35 points) #
Full implement mice actions such that:
- After 20 rounds of simulation time, a mouse produces a new baby mouse at the same location
- A mouse dies after 30 rounds simulation time
- A mouse randomly turns, changes directions 20% of the time
- A mouse is displayed as a blue dot.
Level 1: Mice and Cats (up to 45 points) #
Add a cat to the simulation
- A cat eats a mouse if they end up on the same location. That is, the mouse should die and be removed from the simulation.
- If a cat doesn’t eat a mouse within 50 moves, the cat dies.
- Cats jump two spaces at a time. They do not traverse the grid point they jump over. That is, if they are on space (1,2) they would move to (1,4).
- Cats randomly turn, change direction, 5% of the time.
- Cats are displayed as a yellow dot.
Additionally, in your simulator, have it such that
- Every 100 rounds, a mouse is added to a random location in the city
- Every 25 round, a cat is added to a random location in the city
Level 2: Cats chase mice (up to 55 points) #
In this level, cat’s get a bit smarter …
- A cat searches up to 20 grid points (as measured by the
GridPoint.distance()method) for a mouse to chase. - If the cat finds a mouse, it moves towards the mouse and is displayed using the color cyan. (This is to make it easier for you to debug, and for us to grade).
- If the cat cannot find a mouse, it moves normaly and is displayed in yellow.
Level 3: Zombie-Cats chase Cats and Mice (up to 65 points) #
Let’s add zombie cats to the mix!
First a modification to Cats:
- If Cat does not eat within 50 rounds, they instead turn into a Zombie Cat.
Now let’s define Zombie Cats:
- Zombie cats chase both mice and other non-zombie cats
- Zombie cats can search up to 40 gird squares away (as measured by
GridPoint.distance() - Zombie cats eating a mouse is the same as a normal cat. The mouse dies and is removed from the simulation.
- When a zombie cat eats a cat, that cat becomes a zombie cat placed at the same location in the grid square
- A zombie cat when not chasing another creature is displayed as red dot.
- A zombie cat chasing another creature is displayed as a black dot
- A zombie cat jumps 3 spaces at time. It does not move through the intervening space. That is, if it is at (5,10) it moves directly to (5,13).
- A zombie cat that doesn’t eat anything within 100 rounds dies.
Level 4: Create a new creature type (up to 75 points) #
The final level of the simulation is for you to add a new creature of any type or behavior you want to the simulation. It should fit into the general model of creatures we already have and derive from Creature.
You should include this extra creature in the planning stage (Part A of the project), and fully describe its functionality in the README.md file.
Particularly creative creatures may be subject to bonus points (up to 5), at the description of the grader.